Wirechat Pro
While the free Wirechat package includes plenty of useful features, Wirechat Pro goes further with the message tray, content viewer, and other Pro-only tools.
With Wirechat Pro, you can move from the free package without changing your panel providers, configuration, published views, or application code.
Purchase a Wirechat Pro license from the product page, then access your license key from the Corepine dashboard.
Activating Pro
If your project already has the free wirechat/wirechat package installed, activate Pro from your application root:
php artisan wirechat:activate
The command asks for the email address on your Pro license and your license key. It then prepares Composer for the private Wirechat registry and replaces wirechat/wirechat with wirechat/wirechat-pro.
Activation creates an auth.json file in your project root. Composer uses this file to authenticate with the Pro registry, so keep it out of version control by adding it to your .gitignore.
Single Project licenses require an activation domain or project ID. This value identifies the app that is using the license. Use the same value for local development, CI, staging, and production for that project:
php artisan wirechat:activate --fingerprint=example.com
The activation command stores this value in Composer auth as license-key:activation-domain.
For a new Wirechat installation, run the normal installer after Pro is activated:
php artisan wirechat:install
php artisan migrate
For an existing Wirechat installation, you do not need to delete your panel providers, configuration, published views, translations, or application integration code. Review any published files before overwriting local changes, then run any new migrations and clear cached application state:
php artisan vendor:publish --tag=wirechat-migrations
php artisan migrate
php artisan optimize:clear
If your app already imports the free Wirechat stylesheet, replace it with the Pro stylesheet shown in Pro styles.
Installing Pro Directly
If you are starting with Pro and do not already have the free package installed, first tell Composer where the private Wirechat Pro registry lives:
composer config repositories.corepine composer https://composer.corepine.dev
Composer searches Packagist by default. Wirechat Pro is private, so this command adds the Wirechat Pro registry to your project's composer.json.
After the registry is configured, save the Composer credentials for this project before requiring the Pro package:
composer config --auth http-basic.composer.corepine.dev licensee-email license-key
composer require wirechat/wirechat-pro -W
Replace licensee-email with the email address assigned to your license.
Replace license-key with your Wirechat Pro license key. For Single Project licenses, append the activation domain to the license key with a colon:
Username: admin@example.com
Password: license-key:example.com
The activation domain is the domain or project ID for the app using the license. Use the same value across local development, CI, staging, and production for that project:
composer config --auth http-basic.composer.corepine.dev licensee-email license-key:example.com
composer require wirechat/wirechat-pro -W
You can also run composer require wirechat/wirechat-pro -W directly and enter the licensee email and license key when Composer prompts. Composer may ask whether to save those credentials in an auth file. If you answer no, it can prompt again during the same install because Composer makes separate requests for the registry index and package metadata. Preconfiguring auth avoids that repeated prompt.
After the package installs, run the installer and migrations for a new Wirechat project:
php artisan wirechat:install
php artisan migrate
Then add the Pro stylesheet shown in Pro styles.
Pro Styles
Wirechat Pro ships its own stylesheet. Add this import to resources/css/app.css:
- @import '../../vendor/wirechat/wirechat/resources/css/app.css';
+ @import '../../vendor/wirechat/wirechat-pro/resources/css/app.css';
Keep only one Wirechat stylesheet import in your app.
Cloning An Existing Project
Projects that use Wirechat Pro usually commit the private repository entry in composer.json, but they should not commit auth.json.
After cloning the project on a new machine, recreate Composer auth before running composer install:
composer config --auth http-basic.composer.corepine.dev licensee-email license-key
composer install
For Single Project licenses, set the password to the combined license key and activation domain:
composer config --auth http-basic.composer.corepine.dev licensee-email license-key:example.com
composer install
Use the email address assigned to the license as the username. Use the same activation domain that was registered for the project.
The private repository entry still needs to exist in composer.json. If it is not already committed, add it during the same setup step:
composer config repositories.corepine composer https://composer.corepine.dev
composer config --auth http-basic.composer.corepine.dev "${WIRECHAT_PRO_USERNAME}" "${WIRECHAT_PRO_PASSWORD}"
composer install --no-interaction --prefer-dist
GitHub Actions
For GitHub Actions, add secrets named WIRECHAT_PRO_USERNAME and WIRECHAT_PRO_PASSWORD.
WIRECHAT_PRO_USERNAME should be the licensee email. WIRECHAT_PRO_PASSWORD should be the license key, or license-key:activation-domain for a Single Project license.
In GitHub, go to Settings > Secrets and variables > Actions. From there, add the secrets as repository secrets, organization secrets, or environment secrets depending on how your workflow is scoped.
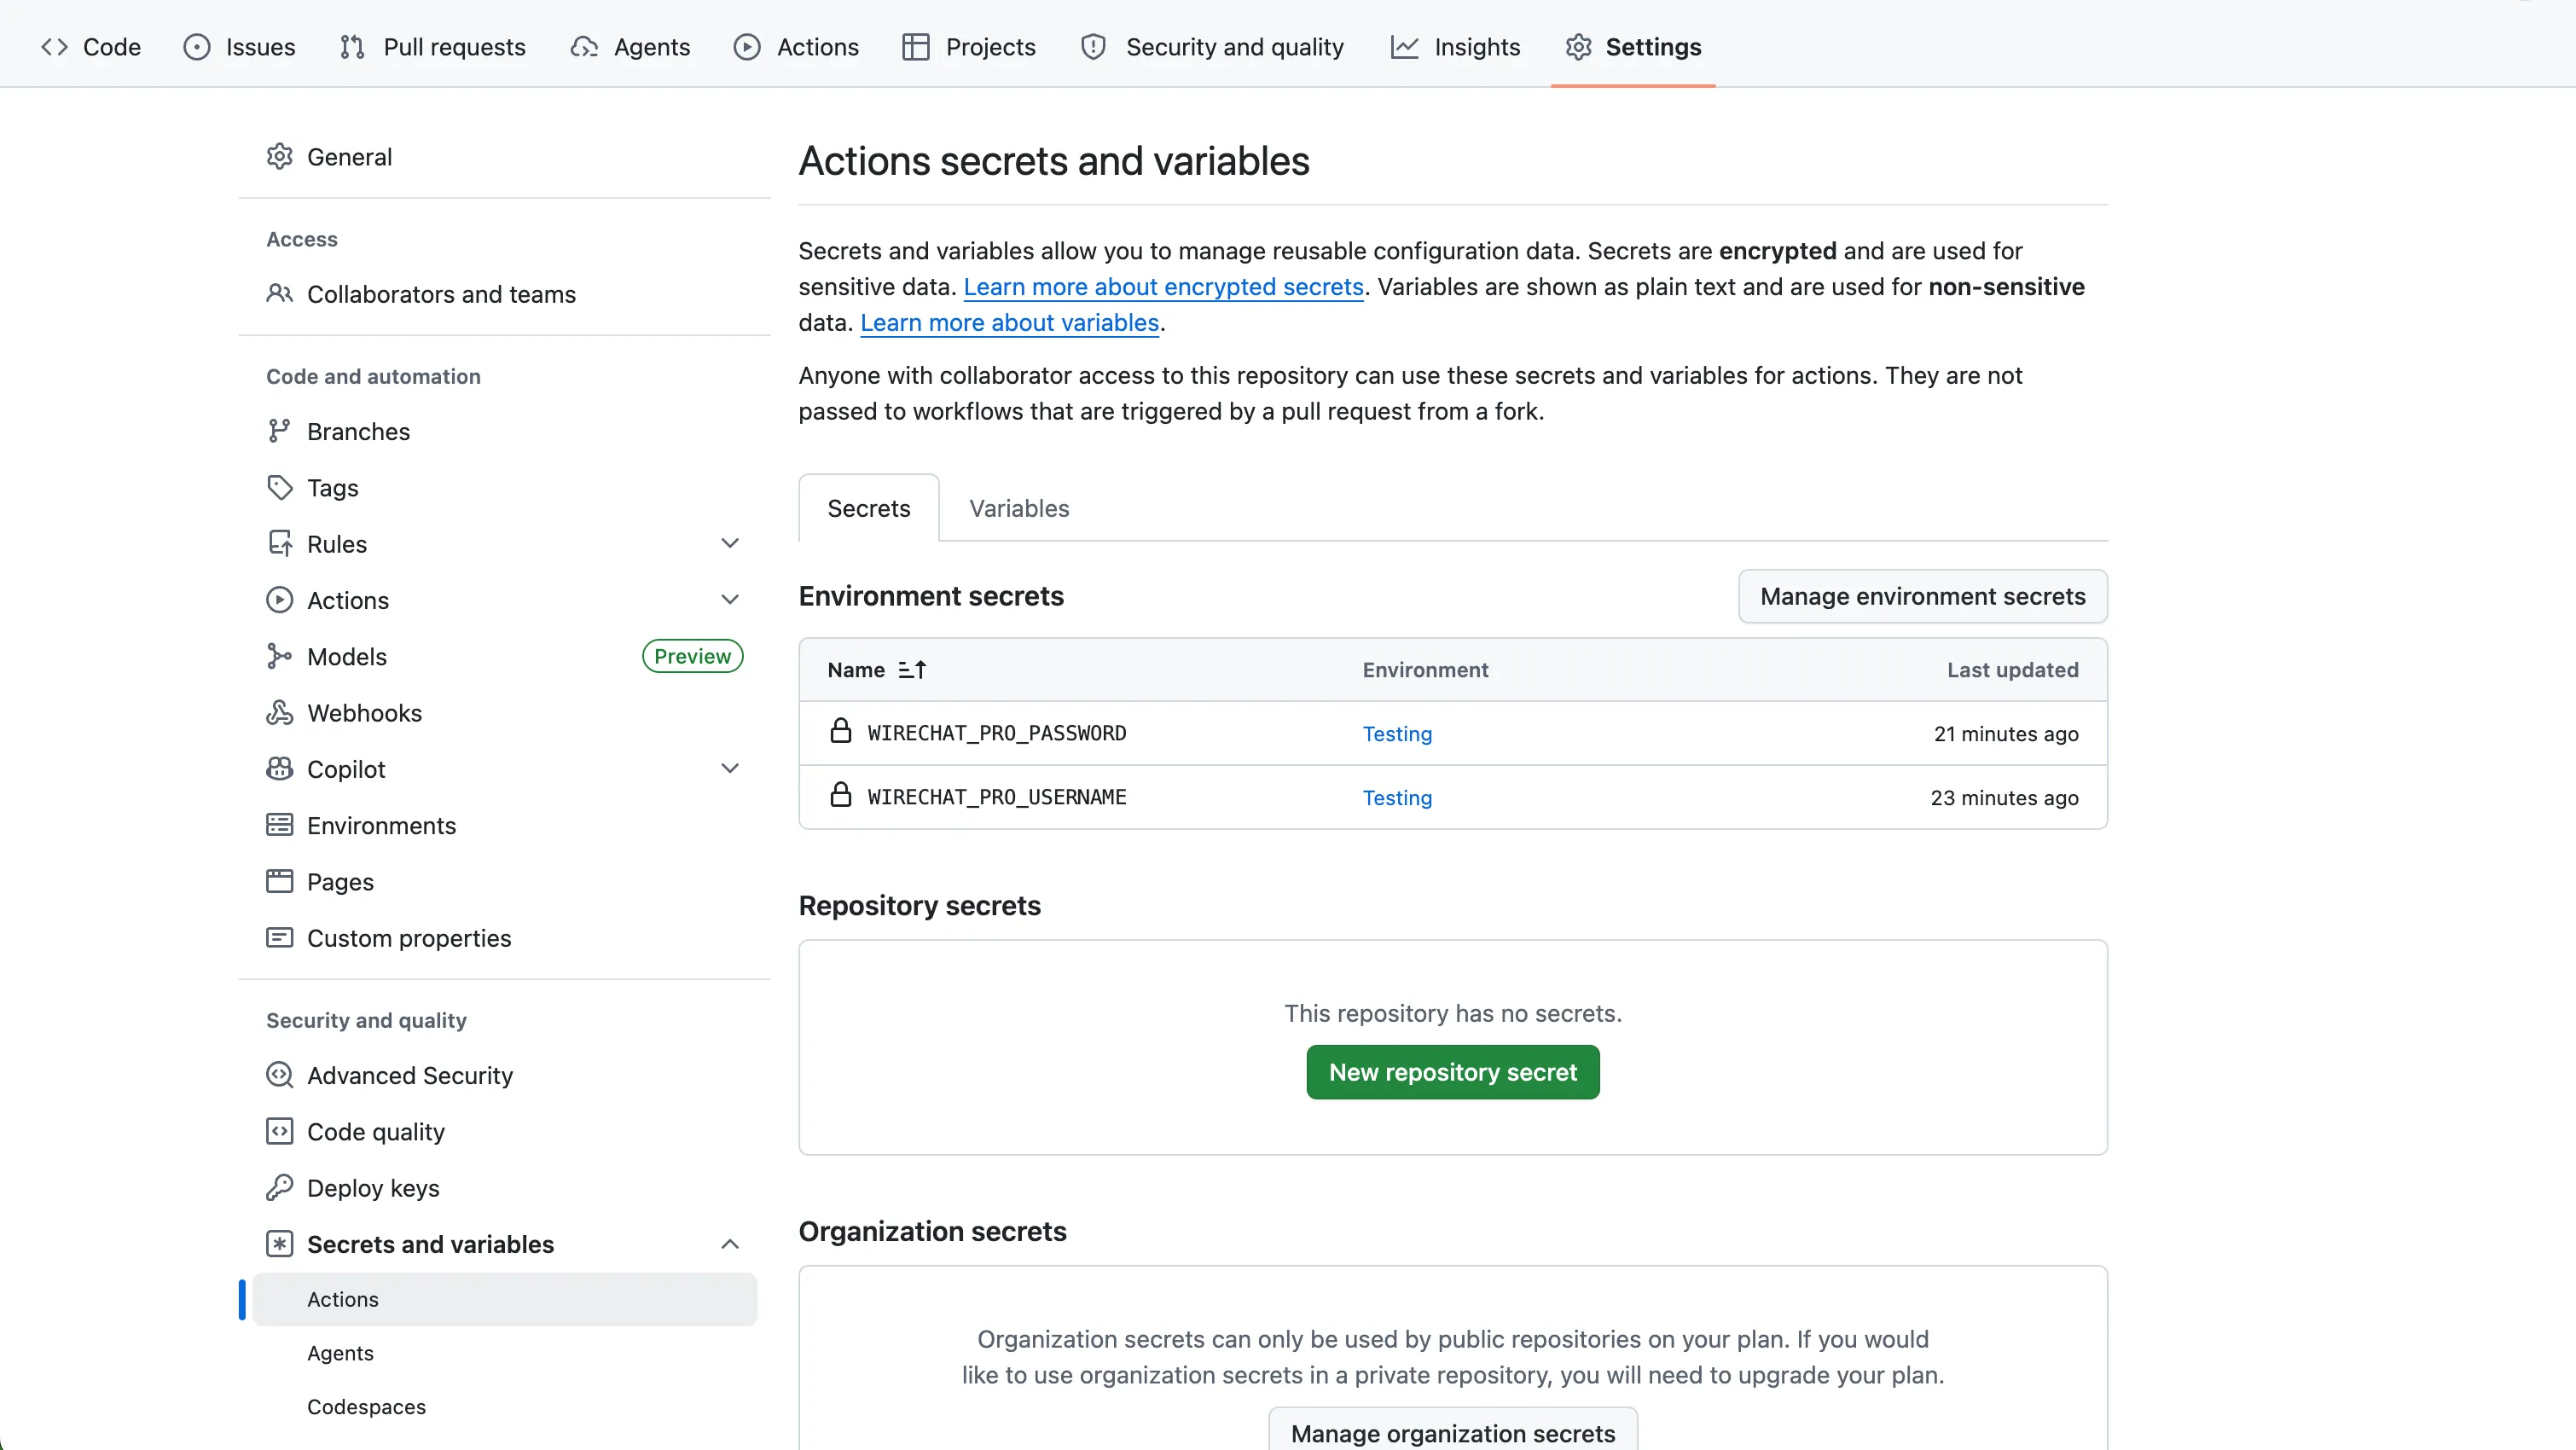
If your workflow job uses an environment, add the secrets to that same environment. For example, this workflow uses the Testing environment:
jobs:
  tests:
    environment: Testing
In that case, make sure WIRECHAT_PRO_USERNAME and WIRECHAT_PRO_PASSWORD are saved under the Testing environment. If the workflow uses environment: Testing but the secrets are saved under a different environment, GitHub Actions will not make them available to the job.
If your workflow does not use an environment, repository or organization secrets are usually the simplest option.
Add the Composer auth step before the workflow runs composer install:
- name: Configure Wirechat Pro Composer auth
  run: composer config --auth http-basic.composer.corepine.dev "${{ secrets.WIRECHAT_PRO_USERNAME }}" "${{ secrets.WIRECHAT_PRO_PASSWORD }}"
If the workflow does not already have the private repository in composer.json, configure it in the same area:
- name: Configure Wirechat Pro Composer repository
  run: composer config repositories.corepine composer https://composer.corepine.dev

- name: Configure Wirechat Pro Composer auth
  run: composer config --auth http-basic.composer.corepine.dev "${{ secrets.WIRECHAT_PRO_USERNAME }}" "${{ secrets.WIRECHAT_PRO_PASSWORD }}"
Activating In CI
Add this command before installing Composer dependencies:
composer config --auth http-basic.composer.corepine.dev "${WIRECHAT_PRO_USERNAME}" "${WIRECHAT_PRO_PASSWORD}"
Laravel Forge
Laravel Forge can store Composer credentials at the server level or the site level. Use server-level credentials when several sites on the same server need the same Wirechat Pro license. Use site-level credentials when one site needs its own license.
Open the Composer credentials section in Forge: Runtime > PHP on the server, or Settings > Composer on a site.
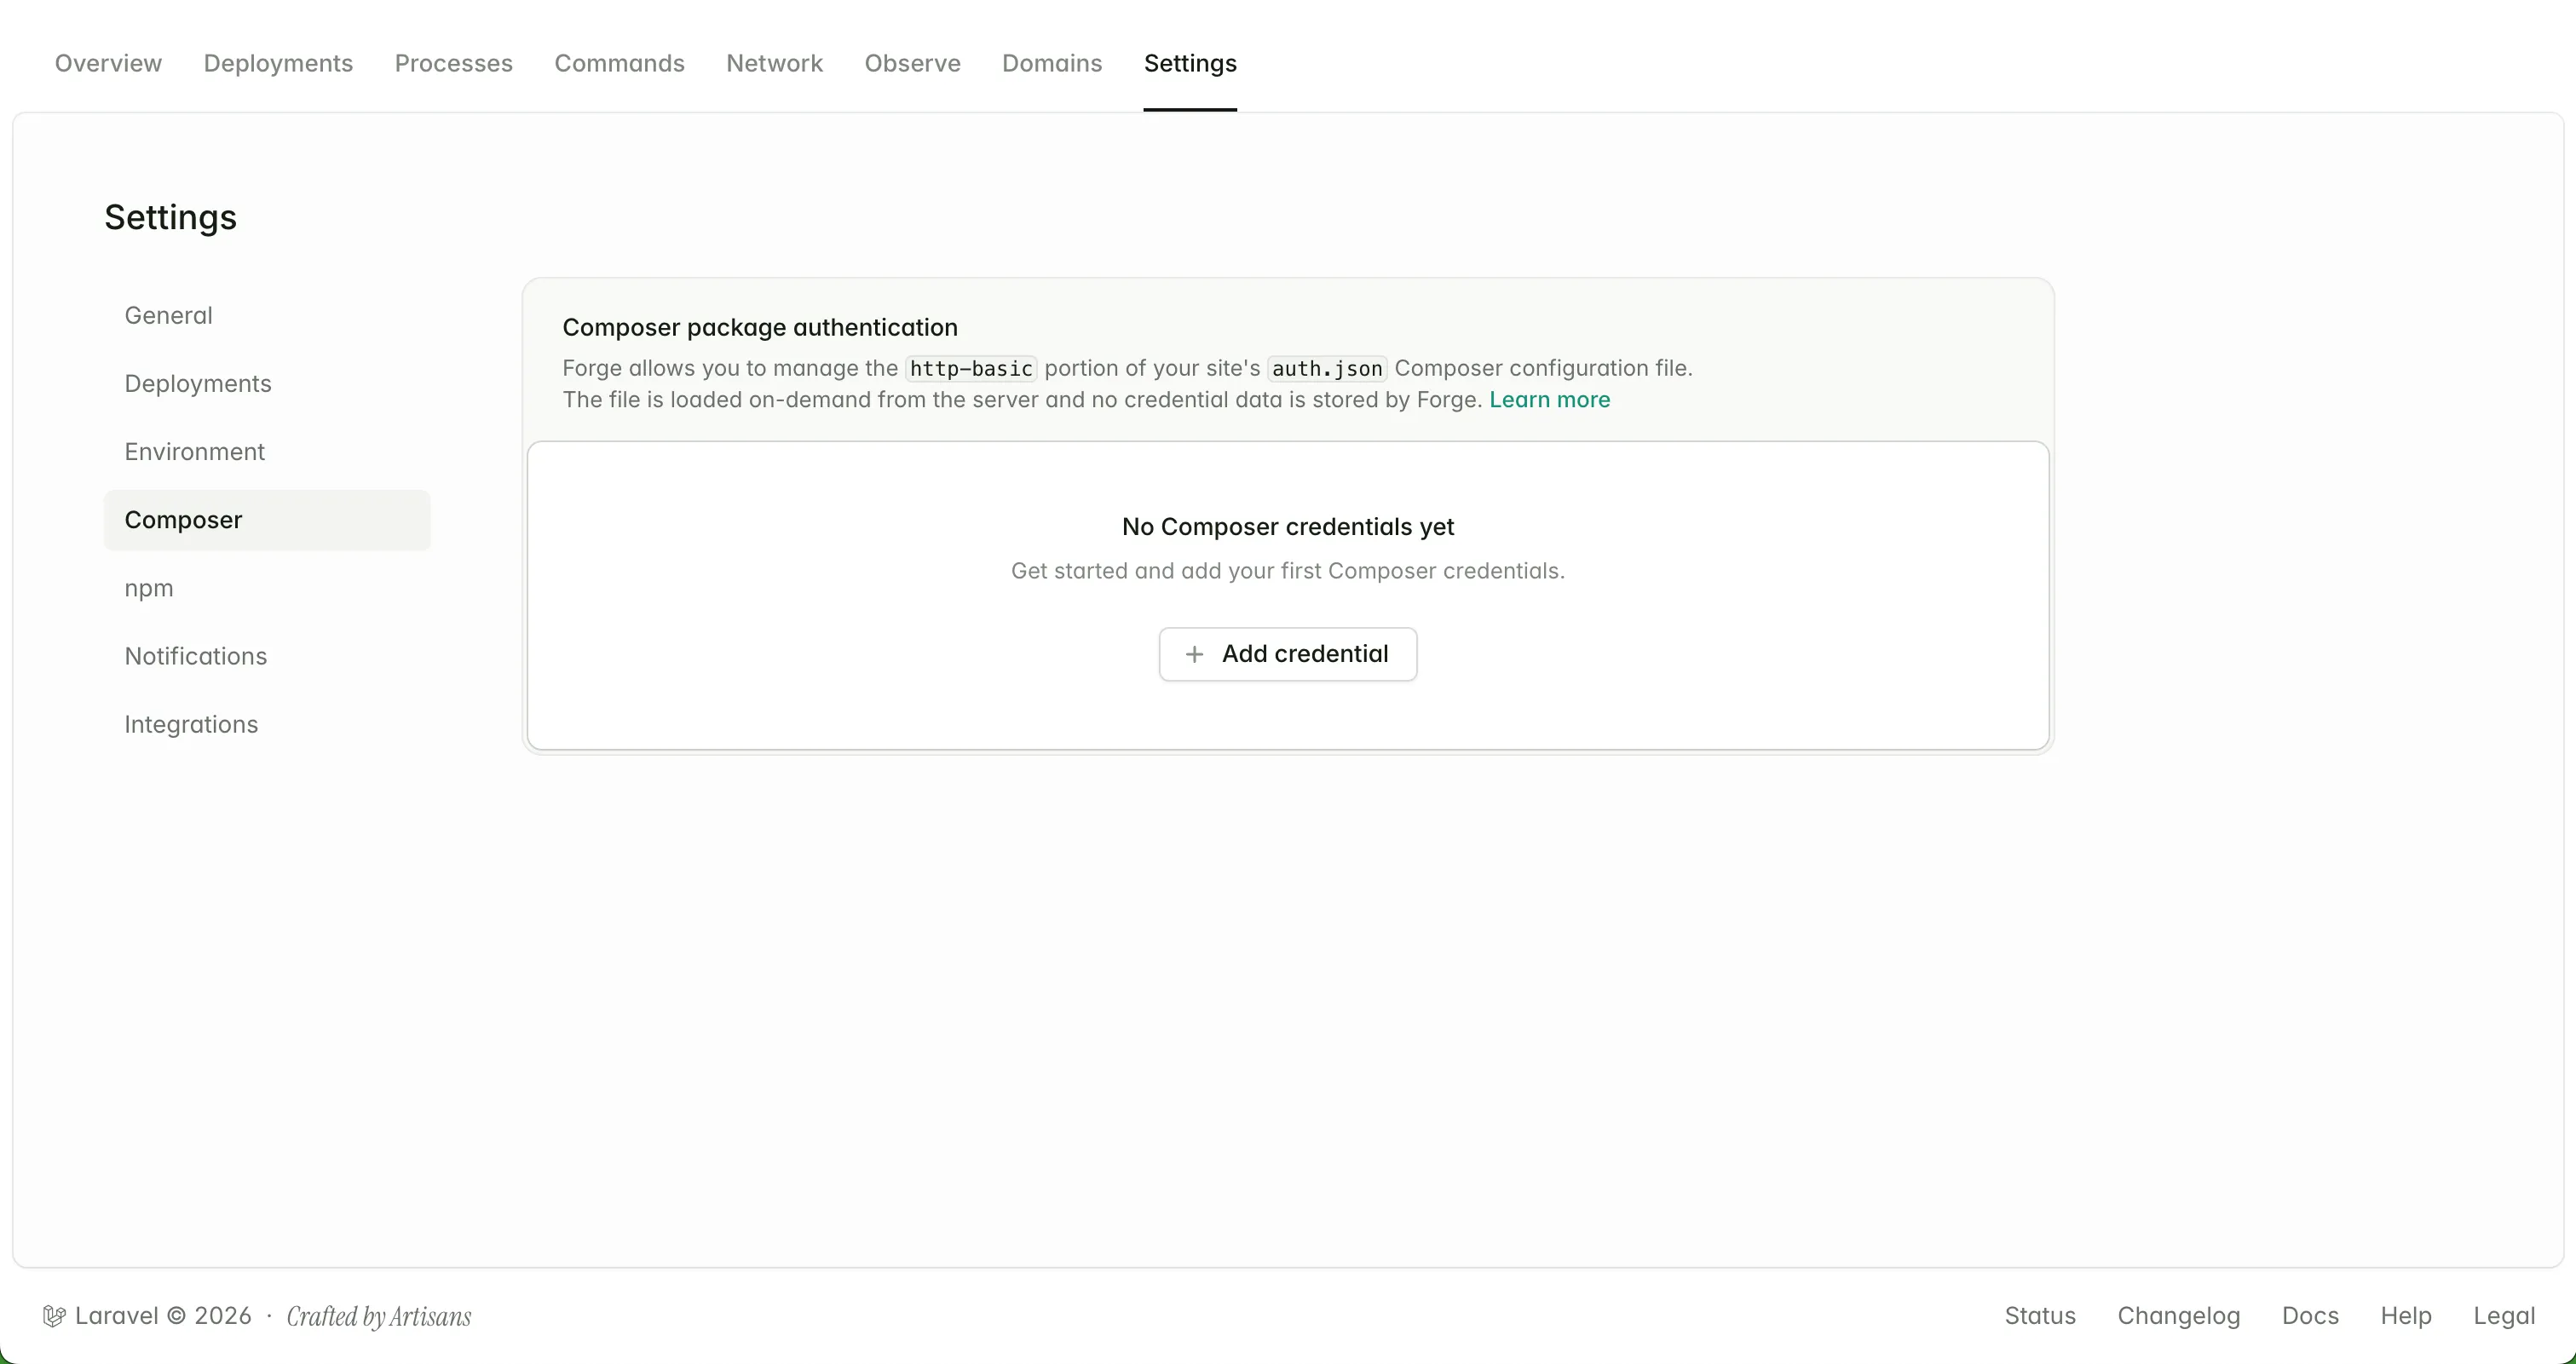

Add a new credential with these values:
Repository URL: composer.corepine.dev
Username: licensee-email
Password: license-key
For a Single Project license, use license-key:activation-domain as the password.
After saving the credential, Forge will apply it to Composer operations for that server or site. Your deployment can then run composer install or composer update without prompting for the Wirechat Pro credentials.
For more information, see the Laravel Forge Packages documentation.
Laravel Cloud
Laravel Cloud can authenticate private Composer packages from your environment's build commands. Open the environment that deploys Wirechat Pro, then go to Settings > Deployments and find the Build Commands section.

In the build commands, place the Composer auth command before the existing composer install command:
composer config --auth http-basic.composer.corepine.dev licensee-email license-key
composer install --no-dev
If the private repository entry is not committed to composer.json, add it before the auth command:
composer config repositories.corepine composer https://composer.corepine.dev
composer config --auth http-basic.composer.corepine.dev licensee-email license-key
composer install --no-dev --no-interaction --prefer-dist
Replace licensee-email with the email address assigned to your license and license-key with your key. For a Single Project license, use license-key:activation-domain as the password.
Save the build command changes, then deploy the environment again. For more information, see the Laravel Cloud Private Composer Packages documentation.
Composer Package Name
The wirechat/wirechat-pro package is published in the private Composer registry and replaces wirechat/wirechat during installation.
If your license credentials are valid but Composer cannot find wirechat/wirechat-pro, confirm that your Pro access has been enabled and that the private registry is configured as https://composer.corepine.dev.